Friday, February 26, 2010

picks (orchid/background play)

i've kicked around the idea for some time now of doing a personal favorite set (or something of that sort) on flickr. i resist, in part, because it seems self-congratulatory (i.e., suggesting that i see my flickr stream as a final showcase or display and not, as i see it, a sketchbook, a space for experimentation and play or, baldly stated, a laboratory. i also resist because i'm afraid i'd either have nothing or everything in that set. sitting here now and thinking about the images that i've taken that i've really, really been proud of, the first (and pretty much only) thing that comes to mind is the panda woe pic taken in san diego. it's the only pic i've taken that makes me want to cry when i look at it. then again, part of my fondness for it might be that it represents one of the rare occasions when diana+ and i were actually getting along. yet i'm guessing that if i started looking through the stream i'd want to add one or more of the gerber pics, one or more of the shasta daisy series, one or more from the cancer walk, one or more of the caffenol images, of the redscaled, and so on and so on. put otherwise, what i think my choices would reveal would be photos picked for sentimental reasons and/or those that represent a kind of first time for me--first time trying something new: a salt soak, caffenol, x-pro, etc.

so what i've decided to do instead is to highlight or spotlight what i call "picks." picks are photos that represent times that i've tried something new. . .and usually trying that new thing has been motivated by something i've seen on flickr--seeing something there that makes me want to try my hand at what i've seen.

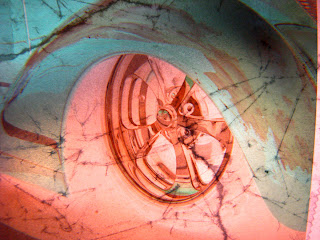
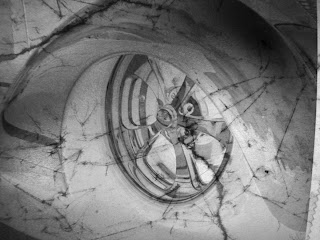
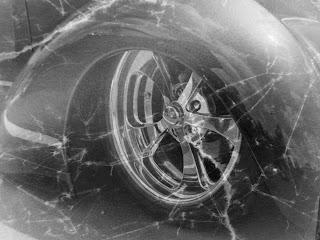
i took these orchid pics with the canon powershot s5 way back in may 2008--shortly after i started engaging in serious photo play but before i started experimenting with film and different kinds of cameras. one of my very first contacts on flickr (i think he's moved on, canceled his account, etc.) often posted images with black backgrounds. more specifically, his stream featured images were the black background dominated the frame. i loved this use of negative space but wasn't sure how to achieve the black background. for some reason, using a black piece of paper/fabric or, as i did here, shooting up against a leather jacket never occurred to me. when i began experimenting with the mostly white background (see image below) i would do this by shooting the plant/flower with a lot of light behind it, metering on the flowers and blowing out the background. of course, a little bit of photoshopping also came in handy for evening up the background.

Wednesday, February 24, 2010

ttv (maybe not for me?)

i wish that i liked doing ttv work more than i do. . .part of the problem is, well, that i suck at it. so it's not always fun to do. and i've tried to build the contraptions i've seen other people make for this and while i greatly appreciate the great work others are doing with ttv's, well, i'm thinking this might not be for me. my cropped ttv's (i.e., see glasses image below) are more often than not deeply flawed (and not in interesting ways). In part, i'm guessing this is because i haven't successfully built a tube-like contraption of my own. rather, light leaks in, i get odd reflections, etc. I do like to do ttv images, however, when the viewfinder and/or camera itself are featured as part of (and not the whole of) the composition, like the first image featured here where you see the phone twice--on the end-table and in the viewfinder (see also the images after the cropped glasses image below). i like, in other words, to feature the full viewfinder frame if not also the actual camera that i'm using.


sooo. . .stuck inside with what i suspect is strep throat (boo!) provided me with opportunities to play around with more "through the viewfinder" images today. and to be honest, i think part of my (renewed) interest in ttv's has to do with having recently respooled 120 film onto 620 spools and knowing that the cameras that i had written off as being "just for ttv work" no longer need to be limited in this way. that said, neither of the cameras i worked with today had been written off in this way. i have two ensign ful-vues and after working a bit with one of them, i decided to take the other one apart and give it a good cleaning. once that was done, i figured i should use it a bit. later in the day, i got out the brownie reflex 20 and did a few ttv's with that.

again, while i love what others have been able to do with this technique, it's not something i'm likely to continue doing on a routine basis. then again, that said, perhaps i will find myself spending the next couple weeks trying to build the perfect ttv contraption. after all, when the ttv's are good, they can be very, very good!


a tale of two scanners


i've talked about alt scanning methods elsewhere but i wanted to do another side-by-side comparing an epson perfection v500-scanned b/w image and a window-scan of the same image. the scanned images were taken with the diana mini, using expired efke kb 400 and diafine developer. the jury is still out on window-scanned color images (i don't always love the blues that come as a result of inverting the image) but i love it for b/w images. in particular, i love the rich sepia tones it provides the images--after, of course, i've inverted the images in photoshop. because window-scanning involves taking macro photographs of the negative, it also allows for more freedom and variation in the way the negative is photographed--close-up, at an angle or on a bend, etc.--and whether it's over- or under-exposed.

Monday, February 22, 2010

respooled and ready to test

woot! using this handy-dandy guide, i finally worked the nerve up to try to respool 120 onto a 620 spool! this was something i learned about and have wanted to try for some time now. . .at least since i bought my first bhf and learned that not all of them will take 120 spools. i lucked out, i suppose, in that all five or six of my bhfs will take 120 but along the way, i've acquired a few cameras (i.e., the imperial reflex, ansco rediflex, sabre 620) that won't take 120 spools and can't be modified to take 35mm. i've been really eager to test the imperial reflex since i got the shutter oiled and working and since replacing the plastic piece in the back (the red piece that covers the counter window).

and so i decided that today would be the day and respooled a roll of fuji across 120 onto a 620 spool and loaded it in the rediflex. it took a few tries, as i knew it would, before i got it right. for me, the biggest problem was figuring out which direction to roll when respooling. the first time through, i got it backwards and had to start again, and then again. getting ready now to respool a roll of color for the imperial. and then it will just be a matter of waiting for a sunny day!

Update: holy moly! it's only been 15 minutes since i created the first part of this post and i'm sooo turned around with this respooling stuff. i set about to respool some color for the imperial and managed to redscale the film. (ironically, a few days ago i had been wondering if this was possible to do with 120--figured that it was if you respooled. . .something i wasn't, at that point, eager to do.)

so i managed to retrace my steps and reverse the film, respooling it again, and getting things back where they needed to be but i will be SHOCKED if these images come out all right. between my shoddy respooling job and the fact that the back of the most plasticky imperial was not aligned correctly when i wound the film to frame one, well, it'll be a straight-up miracle if any of these shots come out. then again, if all this respooling nonsense can help me get these results on demand, i think i'd be cool with it. in that case, i may well make a habit of sloppy multiple respoolings. . .

Sunday, February 21, 2010

lots-o-luck

if this box could talk, the first thing it would say would be "ouch." the second thing it would say would be "sorry it took me three weeks to get here." finally, it would say, "i am definitely not worth the almost 13 bucks you paid for me."

this is not the first lot of cameras i've bought from ebay and i doubt it will be my last. by and large, i've had really good luck (save the spider-in-the-praktica-viewfinder incident. . .clearly still not over that yet). stuff arrives more or less as described (or better--meaning in cases when there has film left in cameras) and it arrives fairly quickly. even the international orders have been pretty speedy. shipping, on the other hand, is usually a nightmare.

in this case, i had to wait nearly three weeks for this midwest purchase. i was willing to cut the sender some slack, given the blizzard of '10 and all but three weeks? sheesh. never mind that it tracked from iowa, to nc, to md. (still puzzled about that route.) given that the shipping was almost 13 bucks (way higher than i'm usually willing to spend) so i expected priority mail. any post-storm generosity i may have been feeling prior to the order's arrival yesterday quickly left me when i saw the pack-job. holy shit. while the first photo above does justice to the hole in the box, what it doesn't capture is how the one side of the box has pretty much caved in. double sheesh.

the thing that sucks about waiting for cameras (at least for me) is not that i'm particularly eager to test them or that i particularly need anything i've ordered. it's more a matter of wanting what i want when i think it should arrive. so prior to the time the mail is typically delivered, i'm all sweetness and light, thinking today will be my lucky day. when i learn that the package hasn't arrived, i become a petulant seven year old child who spends the rest of the day pouting and imagining all the cool things i could have done with the cameras i don't particularly need, that i'm not actually in a big hurry to use. and so it goes.

the big fun begins when the order arrives: have i bought a pig in a poke or no? if things aren't working well (at all?) or if the cameras are in rough cosmetic shape, will i be able to get things working or looking okay again?

in most cases, the seller can't vouch for the quality of the items (i.e., stating that they are "estate finds" and have not been tested but appear to be okay or something along those lines), so it is a gamble. again, getting more or better than one expects is a good thing. getting a dead spider in the viewfinder of a camera the quality of which the seller did vouch for (said it worked well, everything functioned) makes for a long, pissy, regretful kinda day. with this lot, no claims were made about the quality or functioning of the items featured here, but the images the seller featured all looked pretty good, save perhaps for the imperial reflex duo lens--one of the reasons i wanted the lot in the first place. in this way, buying this lot represented more of a gamble than i'm usually willing to take.

despite the piss-poor packing job (definitely not worth 13 bucks), all but one of the cameras remained in its bubble wrap. the agfa b2 commander (the folder in the bottom right corner of the image above) was loose in the box but arrived closed and so in one piece--no damage to the bellows. everything looked pretty good on the agfa. the lens could use a little more cleaning and i struggled to get the lens element apart to do that--so far, no luck. i'll also need to find something to put over the film counter window in the back. there's some yellow plastic there now, but it almost appears that the normally red material featured on the backs of camera that take film with paper backing (i.e., 120/127) has been chipped away. bottom line, shouldn't take much to get this one into decent working order.

the brownie hawkeye flash (top right of image) was incredibly clean and the box it came in was in pretty decent condition. when i took off the back of the bhf i noticed that there was a lot of powdery white substance on and around the lens--something i definitely hadn't been expecting given how clean and shiny the camera was. i took the camera apart so i could clean (and then flip) the lens. bonehead move number one: for some reason, i decided to test the shutter while the camera was apart. this caused one end of the tiny spring that connects the shutter release button to the shutter proper to come loose. i got that back in place and then decided to try the shutter again. bonehead move number two: this caused both ends of the spring to come loose. to make sure that i put this together properly, i had to take apart another of my bhf. it took me about 10 minutes to get the spring in place (again, the spring was incredibly tiny!) but the camera looks great and it even takes 120 without any effort. bonus. oh, and speaking of bonus, inside the brownie box were two rolls of kodak verichrome pan 620 (exp. dec '74). i actually new that these came with the lot. along with the imperial, the rolls of vp 620 were also another reason i was willing to gamble on this lot.

the kodak pony 35mm (bottom left) looked just as good and clean as the bhf. and it came with it's own case. the best part is that it's a working pony. i've ended up with a pony or two from previous lots and they've never worked. this camera was, in fact, the first one i tested of the lot.

as for the imperial. (sigh) it was pretty dirty and perhaps most disheartening of all was the fact that the shutter only half-worked. meaning that it only worked correctly half of the time. another odd thing was that the shutter release lever appeared to have been bent backwards. the item was packed well with bubble wrap so i didn't think it had been damaged on route to me. fortunately i didn't mess with the lever till i looked at other images of the camera i found on flickr. apparently this is how they were made. i unscrewed the four screws on the front of the camera, removed the front plate but was bummed to find that that was as far as things went. otherwise put, i'd been hoping to get to the shutter on this most-plasticky camera. i began cleaning the outside sides of twin lenses and in the midst of doing this, i must have moved the camera in a fortunate way as the plastic piece beneath the frontplate fell off and i was able to get to the shutter. oiled that a bit and the shutter is functioning wonderfully and consistently. with the front plastic piece removed, i was also able to clean the mirror and the other sides of the lenses. the camera is actually looking pretty good. i was bummed, however, to learn that i will definitely need 620 for this one. usually i can get away with 120 film in the supply side of 620 cameras (i.e., as i can with all the bhf's i have) if i cut the ends of the 120 rolls but in this case, i'll need to respool 120 onto 620 spools. i've never attempted to do this before but figure that if i learn to do it successfully it will allow me to film-test a few other tlrs that i've only ever had occasion to use for ttv photos.

Monday, February 15, 2010

pass the salt, please

Just a few days ago a friend pointed me in the direction of this flickr stream. Perhaps because her redscaled images were the first images I saw, it made me want to try my hand at redscaling again. (see previous post.) But what I was really drawn to was her set of salt-soaked images, particularly so, some the black and white ones.

As luck would have it, I had on hand some junk negatives--strips containing images that I'd likely never use or look at again, strips that I'd throw out if that didn't make me feel so guilty or wasteful. So I had the negatives, problem was, I never, ever have salt on hand and insofar as the blizzard of '10 has made getting out challenging, I had to wait a day or two before I could try this myself. I'm still not sure how I feel about these first results. The image above offers a side-by-side comparison (with and without salt). On the one hand, I love anything that adds texture to images. On the other hand, well, I'm left feeling (as ever) that I didn't follow directions closely enough. To be fair, the negatives I had to work with weren't terrifically interesting or sharp ones--and this is one of the reasons I'd have been willing to junk them. A lot of the directions I found for doing salt (or bleach) soaks aren't terrifically precise (then again, this is experimentation, right?) and as a strict direction follower and one who is always asking, "am i doing this right?", I found this mildly distressing. Also, as someone who learns best by watching others do things, I was hoping to find a visual/video guide to doing this. Normally, I don't mind practicing a new technique till I get something that I'm happy with and/or that is in keeping with what I was going for (i.e., the image/s that motivated me to try the technique in the first place), but in this case, knowing that I'm essentially trashing the negative, well, it makes continued practice/experimentation a rather daunting prospect. On the one hand, if the negative is a good one--containing images I'd likely want to use again, say for window-scanning, I hate to ruin it. If the negative is one that I'd just as soon trash, well, what are the odds I will ever like the salted version? That said, I salt-soaked another batch of images this morning. This time around, I used a shallower container for the soaking, used a bit less salt and I think the water was a bit hotter. In this case, I've soaked redscaled images as well as a few more black and white. Featured above are 35mm images taken with the banner (diana clone) camera and below is a color image I took with my zero image 4x5 pinhole camera.

redscale redux

I tried working with redscaled film for the first time in the fall of 2008 and tried it again in July 2009. And I wasn't at all crazy with the results. Case in point, the almost purple image to the left. blech. The results from July were so unfortunate, in fact, I ended up converting the images to gray scale before adding them to the redscale set. Part of the problem had to do with using a fixed focus camera like the ultronic panoramic--the film wasn't being exposed for long enough. I had happier results using an slr as this allowed me to fiddle with the shutter speed, iso setting and aperture settings. (see flower image below.)


Having noticed lately a lot of people getting great results with redscale I tried it again this weekend. It had been so long since I last tried it, I had to consult again this most excellent online how-to. (As an aside: I can't believe people would pay money for redscale film when it's a really simple diy modification. . .maybe shelling out 14-16+ bucks for a three-pack guarantees better results?)

I also took a look at flickr discussion on redscale and decided to shoot 400 speed film at 50--see what that would do. I was much happier with the results. I was finally able to get the golds and oranges I was hoping to get the first time around. By the by, here is a link to another most excellent visual/verbal resource for redscale.

Sunday, February 14, 2010

coinky-dink

what a huge coincidence. this new lot of expired film arrived yesterday and shortly after i finished the post on found/expired films. the lot included a snapshot kodaguide, one roll of verichrome 120 (exp.feb '51), one 35mm roll of plus-x pan (exp. jan '58), one 35mm roll of plus-x pan (exp. mar '68), one roll of 35mm super-xx safety film (exp. jan '55) and one 35mm roll of tri-x. I'm not sure of the exp. date on this one since the box is missing. what's more, there's no leader here, so i suspect the film has been exposed.

as for the coincidental part: when i bought the lot, it appeared as though the silver canister (far left) was empty. when the lot arrived, i saw that it contained a roll of developed b/w negs. BONUS! more images to add to my found film set. If the green cartridge in the center of the image also contains exposed film, that could mean 56 more images for that set.

i've window-scanned a number of the negatives (featured below) and I also epson scanned a few last night. the problem is, I don't want to cut the negatives into sections so i was only able to epson-scan the first and last three images on the roll. hmmm. what to do?

It's odd to look at images someone else has taken. You wonder who they were and why these images? I'm considering developing the tri-x later today to see if my guess is correct here--that the film inside is, indeed, exposed. what are the odds that it's held up, will develop, etc. if it has been? I suppose in a worse case scenario, I could develop the film and find that it hadn't been exposed. . .I'd be kicking myself then for not running it through a camera. So it's a gamble (and i"m not a gambler)--I can develop the film and hope for the best or I can run this through one of my cameras and hope for the best in terms of decent double exposures. UPDATE: I decided to develop the roll of tri-x and it was no bueno. It looked like the film had been exposed--there were shadows on the film--but no images showed up (or turned out). boo.


Saturday, February 13, 2010

found film

Perhaps the only thing better than finding unexposed expired film for cheap on ebay or in a resale or antique shop is finding exposed expired film in a camera you find for cheap online or in person. I got a windsor diana clone as part of a lot of cameras I bought a couple months ago. Actually, the only reason I even bid on the lot was because of the windsor. As I recall there were a number of 126 cameras in the lot, disc cameras--stuff for which you can't get film. But I saw the diana clone and figured this was a cheap-ish way of getting the camera. (Things on ebay marked as diana clones can get insanely expensive--this just said that a windsor camera was included in the lot.)

I was delighted to find that two of the cameras from that lot had exposed film in them. (In all, there were probably 7-10 cameras in that lot that had film in them but there were only two that had b/w film in them with most of the roll already exposed.) The two images here are from the windsor. There was also a tech model 72 126 camera with film in it. When I was in maine this fall, I picked up a kodak instamatic x-15 with film in it for 4 bucks. Ironically, the x-15 had been part of the lot referred to above, so I didn't technically need another. I just wanted the film inside. I asked if I could just purchase that--the woman at the antique store said no, i had to buy both parts. To be clear: I wasn't looking to save money--I just didn't want to lug home and then find a place to store another camera, particularly one I wouldn't really have occasion to use. The images from the found films can be viewed here.

the bend project


Now that the manuscript is finished, I've promised myself that I'll spend more time writing (and writing more regularly) here. I started the bend project a couple months ago. I was feeling pretty burnt out with most things related to photography. I didn't want to test new cameras or film. I'd gotten tired of that and without any conference travel plans on the horizon (having a chance to take pics places I'd normally never get to is the main incentive for doing conferences these days), well I'd grown pretty bored with things. Inspired by a flickr contact's seemingly endless creative projects and experiments, I decided to try to take a photograph of the same (approximate) point on a riverwalk path with each camera in my collection. I've only got 20 in the flickr set so far. For a time there, we were walking the path once a day. With the snow, the semester starting, etc. I've not gotten back there as often. Still, I figure that if and when I'm back there, I'll take with me another camera or two and see what else I can add to the set. Having only gotten to know this fabulous place in December, I'm eager to see what the walk looks like in spring, summer and fall! Featured below (top down) are bend pics taken by the holga, a 110 vellum film plane camera and a suprema camera with a vignette jelly lens. The first image of the bend was taken with the vivitar vivicam 8025.


Friday, February 12, 2010

on inverted (or inverting) images


Ctrl+I in photoshop will invert an image. Here, I've put together some before and afters. The first image (above) is the color negative as photographed with the digital camera, the one below that is the image after inverting it in photoshop. With the bottom pairings, I grayscaled the photographed negative and then inverted it.


alt scanning--a comparision


the image to the left was scanned in the "normal" way--with my epson perfection v500 scanner. the middle image was window scanned with crumpled wax paper beneath it. the image to the right was scanned using the viewlex previewer jr. the original tree image was taken with a banner camera--a diana clone. i really like the way the b/w images window scan--in nice, rich sepia tones.

alternative scanning (part 2)


As ever, flickr has been the most amazing learning tool. I saw this image posted by a contact and wanted to learn more about how it was created. As an aside: My general method when using flickr as a learning tool is to seek out images that appeal to me and learn how the composer made them--most times this has to do with finding out what type of camera, film or processing technique they used and if I can afford the camera, film or stuff for processing, I'll give it a shot. 200+ cameras later, I was happy to find something to experiment with that allowed me to repurpose or remediate the negatives I had on hand. And that gave me reason to use craft supplies that I'd normally never have occasion to use. Following these directions and after looking at the most amazing collection of scanned negatives I've ever seen, I rigged up my own lo-tech scanner (my kitchen window) and starting experimenting with different textures--pages of my manuscript, crinkled wax paper, bubble wrap, textured craft paper, pieces of a plastic milk carton. The general method involves taping a texture to the window, placing the negative over that, and taking a macro shot of the negative and then inverting the negative in photoshop.

Since I was almost finished with my book manuscript at the time I learned about this technique, I decided to pull out some old vacation negatives and place those atop pages of the manuscript. I then started experimenting with different materials place below and on top of the negatives--there's a sampling below and still more here.


alternative scanning (part 1)


I picked up this viewflex previewer jr in an antique store in maine last fall. you can feed strips of 35mm negatives through the top (or bottom) of the mechanism and view each of the images before printing or, in my case, scanning. using my canon powershot s5's macro setting, i can take images of what appears on the screen and invert those images in photoshop. inverted "as is" results in a very blue image (see below), so i flipped them to grayscale in photoshop.